Woodworking uses an array of power tools, each with a different purpose. Common tools are power drills, electric sanders, routers, jigsaws, table saws, among many others. According to most carpenters, woodworkers, and other DIY amateurs, one of the most efficient and versatile power tools is the random electrical sander. It can be used in place of both an orbital sander and a belt sander.
Knowing the above information, you’ve purchased a random orbital sander, and now you find yourself wondering the proper way to use it. Or maybe you have already been using it for a while, and think there is room for improvement on your technique. Regardless, this is the ultimate guide on how to use a random orbital sander.
Understand How A Random Orbital Sander Works
To use your power tool correctly, it is important to understand how it works. Before we get started, you should already be able to differentiate whether you have a random orbital sander or an orbital sander. The former usually has a circular pad of sanding paper, whereas the latter uses a square (or triangular) paper. That isn’t the basic difference, but it’s an easy clue to spot. Also, the random orbital sander has a more powerful motor and can be used for heavier tasks where more material needs to be removed from the surface.
The difference between the two is that while both rotate, the random orbital sander is also slightly off centre and moving in an up-down motion. This motion gives it an unpredictable (random) pattern and thus it leaves less visible scratches. Also known as swirling, this pattern of scratches is very obvious when using an orbital (quarter-sheet) sander. With a random orbital sander, the unpredictability causes any scratches to cancel each other out, to result in negligible swirling. Incorrectly using your random orbital sander will still result in swirls that can be seen upon close inspection.

Safety And Other Precautions
As with any power tool, there are always safety precautions that must be taken before and during work. These are some general guidelines and safety tips:
- Dust Mask – This is a must when doing any type of sanding. It applies even if you are using a vacuum to keep sawdust at bay, to avoid any breathing problems.
- Safety goggles – you should wear eye protection at all times, as a precaution. This applies even if you don’t expect large pieces of wood flying away from your power tool.
- Gloves – The sanding disc on a random orbital sander can cause serious abrasions on your skin should any accidents occur.
- Keep the sander on the surface, and secure it with a firm grip before turning it on to avoid any slips as it has a powerful motor.
- Hearing protection is a must when using any power tool, even if it is seemingly quieter than others. This is to avoid damage to your ears that could lead to hearing loss.
- Be mindful of where the cord is to avoid any mishaps.
- Experiment on scrap wood to understand your tool better before using it in your projects.
- Replace your sandpaper pads regularly, to avoid any damage to your tool or the material you are working on.
Pressure
This tool is hand held, so the amount of pressure applied is entirely in your control. The general rule is that the machine was designed to work with minimal pressure, if any at all. This means you should merely be guiding the machine, and try not to apply any extra pressure. Too much pressure not only risks damaging your handiwork, it is also damaging to the motor of your electrical sander – so stop pushing down on your power tool.
Also, pressing on the sander will slow it down, further wasting your time and energy. It is always advised to try to maintain constant pressure to avoid inconsistencies in your finished surface. A common method used as a guide to ensure even pressure, is to mark wood (a zigzag line is enough) with a lead pencil. If you are applying equal pressure on the whole surface, you should be able to sand away the marking. The same can be done on any surface. Use a gliding motion, and try to overlap your glides, but do not stop moving the sander at any moment.
Understanding Grit Size
While the motor is doing most of the work for you, it is of no use without the sandpaper disc. Before using a random orbital sander, you should understand the different types of sandpaper discs and what a higher or lower grit means.
Generally speaking, a higher grit gives a finer finish. Sanding paper has a layer of abrasive particles that are used to create a smooth surface. Historically, sand (or glass) was used as the abrasive, but has long since been replaced by other materials. The size of these abrasive particles is measured to give the grit size. The standard definition of grit size as a measurement is the number of particles per inch of sandpaper. Thus, smaller particles which are more abrasive give a higher grit, and vice versa.
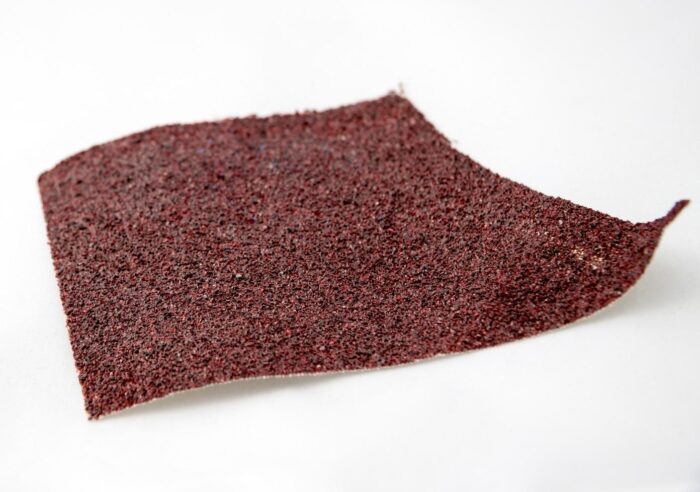
When sanding a thicker layer of rough material, it is always advisable to use rougher sandpaper first (lower grit), and work your way upwards to a finer grit (higher). In this way, the lower grit sandpaper will remove most of the material faster, leaving the finer finish to the higher grit sandpaper. If this all seems too confusing, just remember to start with a smaller grit, and repeat the process with higher and higher grit until you have achieved the desired smoothness or polish.
Keep in mind that although you should increase the grit size, you do not need to use all the different sizes. It is more efficient to skip some sizes – you’ll achieve the same effect without wasting so much sandpaper and time. Most people use a total of three grit sizes. Use a grit size chart to choose the appropriate grit. After using the finest grit you intend on using, it is always a good idea to use the same sanding disc manually to be thorough.
Don’t Rush
It is highly advisable to use the sander slowly. It is moving at its maximum power and efficiency, and moving it faster will not give you fast results. The only thing a fast motion will give you is an uneven surface. Many professionals advise that you move the machine an inch per second to get the smoothest surface possible.
Angle
Do not attempt to tilt your sander to smooth out an uneven surface. You should always keep it as flat as possible, or risk scratching and gouging the surface. This may take some time getting used to, but it will be easy if you are holding the tool properly. Especially for tough to reach places, you might want to get in the habit of holding it by the neck for more stability.
Also, make sure you are working on a stable, level surface to ensure a consistent finish. Try to always keep the entire disc on the surface to make sure it is not tilted.
Sawdust Is Your Enemy
You already know that breathing in sawdust is hazardous, and that you need to take precautions against doing so. Many random orbital sanders come with a dust collection bag, but some do not. The sawdust is not only dangerous to your health, but it also leads to an uneven surface by reducing the efficiency of the tool. This happens as the sawdust collects on the surface, under the sanding pad.
Some models allow the dust collection bag to be removed and the machine can be connected with a vacuum to avoid sawdust entirely. For models that don’t have this feature, an adapter can be used for the same effect. Eliminating sawdust in this way ensures that the workplace is clean, and enables more even, efficient sanding.
What jobs are Random Orbital Sanders Suitable For?
As mentioned earlier, this tool has a wide variety of uses. It can be used on multiple materials, and not limited to woodworking. It can be used to remove paint from hardwood floors, walls, or even drywalls. These are only some of the many uses for a random orbital sander:
- Stripping paint – You can sand away old layers of paint from furniture, hardwood floors, or even walls.
- Polishing solid surface – This tool is often used to polish different types of solid surfaces such as wood, stainless steel, or stone. The only change is the type of sandpaper used.
- Sanding Drywall – It is commonly used to smooth out the surface of a drywall before paint or any other coating is applied.
- Buffing – Creating a matte effect from glossy paint is easy using this tool.
With a little knowhow, you can avoid making many mistakes when using your random orbital sander, and use it in many ways. Now that you have all the information you need, you are capable of going ahead and experimenting with your power tool.
