Are you tired of having to look for the right socket to fit the bolt or nut you want to use? While socket organizers are a thing, it can be challenging to find one that’ll fit your sockets perfectly. In that case, you’d be better off making one yourself at home.
With a DIY socket organizer, you can choose the material, size, number of compartments, and overall design. To help you out, we’ve prepared this quick guide to walk you through the entire project.
What You’ll Need
We recommend using plywood for this quick weekend project, which you probably already have at home. As opposed to buying a metal socket organizer you’ll find in stores, you won’t have to shell out much for this.
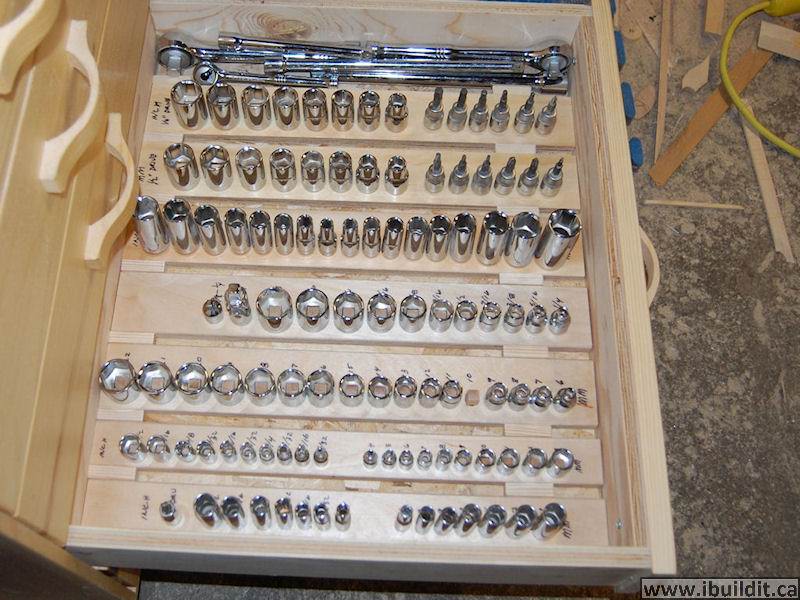
This homemade socket organizer has an open design. Plus, you can easily alter the size to accommodate the number of sockets you have, plus extras.
To start this project, here’s what you need to prepare:
- Wood glue
- Plywood
- 4-foot 1/4-inch dowel
- 4-foot 3/8-inch dowel
- Drill press
- Saw
- Hammer
- Ruler
You can also use a wood-burning kit to give your socket organizer a personalized touch or a unique twist. You might also want to prepare your hanging kit. Once everything is ready, you can proceed to the next section.
How To Make a Homemade Socket Organizer
Depending on your preference, you can put this socket organizer in a drawer or just lay it on top of your work table. Others prefer hanging it on a wall to save some valuable workspace. Where you decide to put it will determine the size of the main boards.
Step 1: Prep the Board
Cut the plywood to your preferred width and length using a reliable saw. If we’re to decide, a table saw is the best tool to use for this. After cutting it to the right size, sand it down until you achieve a smooth surface. If you want, you can also leave it be.
Step 2: Mark Where the Sockets Will Be
To space the sockets perfectly, it’s a good idea to use a ruler. With a ruler, it’ll be easier to space the sockets equally. Even with different socket sizes, you can ensure they won’t end up too close together or have weird positions.
In addition to using a ruler, some DIYers line the sockets on top of the board to visualize their placement easily. Allow enough space in between so that you can quickly grab the socket. At the same time, you’ll need some space to label each dowel.
Step 3: Start Drilling
Using a drill press, start drilling the holes for the dowels. If you don’t have a drill press, you can use a handheld drill instead.
To do this, grab your drill’s 1/4- or 3/8-inch bit. You can choose to drill the holes all the way through since you’d be using wood glue to keep the dowels in place.
Step 4: Cut the Dowels
To hold each socket snugly, start cutting the dowels to about 1 3/4 inches, and then sand down the top end of each one. This way, the sockets can easily slide down onto it.
Step 5: Attach the Dowels
After preparing the dowels, you can go ahead and attach them to the holes you made earlier. Since you used a drill press of the same size, they should fit snugly. Apply some wood glue to the bottom end to secure them in place.
Next, grab your hammer and give each dowel a couple of taps. This way, they can sink further down into the holes.
Lastly, with a wet cloth, wipe each dowel to remove excess wood glue. Allow the glue to dry overnight, keeping an eye out for dowels that wobble or slide out of their holes.
Step 6: Write the Sizes
The primary purpose of making this DIY socket organizer is to make it more effortless for you to find the right socket size. Hence, labeling each dowel with the socket sizes would be a great idea. By doing this, you won’t find yourself picking up a couple of sockets before finding the right one.
For an even more professional finish, put the sockets on the board so that you can see where to write the labels exactly. The sockets won’t cover the labels, making them impossible to read.
You have plenty of options when marking the dowels. You can use a pen, a label maker, or even paint. Others prefer using a wood burner to ensure the markings last forever.
If you decide to go down this route, use a pencil first. This way, you’ll have a template to trace before you start burning the wood’s surface.
Step 7: Set up Your New DIY Socket Organizer
As mentioned, you can place your new socket organizer in a drawer, set it against a wall, or hang it near your work table. Whichever setup you end up with, we’re confident that this project will help make your DIY undertakings more time-efficient.
Keeping Your Sockets Organized
As you can see, making a DIY socket organizer is very simple. In fact, you can finish the entire DIY project in a couple of hours. Even better, it will save you money and ensure that all your sockets and future ones have a dedicated home in your work area.