Windows that land in unexpected places can feel like a design puzzle: a sliver of glass too high for curtains, a low sash that interrupts furniture flow, or an oddly centered pane that throws off a wall’s balance. At first glance they look like mistakes, but those quirky openings also bring unique light, viewlines, and personality that, with a few thoughtful choices, can become the room’s strongest feature.
This article explores practical,creative solutions for making awkward windows work – whether you’re dealing with tiny bathrooms,odd corners,or living rooms with split sightlines. You’ll find strategies for reframing the window’s role through trim and paint, soft treatments, clever furniture and storage arrangements, and lighting and greenery that harmonize rather than compete.
No matter the size, shape, or placement, the goal is the same: transform a spatial hiccup into an intentional design moment that complements the room’s function and mood. Read on for adaptable ideas you can tailor to your home, budget, and aesthetic.
Shift the eye with curtains and rod placement to lengthen or shorten windows
Where a window sits doesn’t have to dictate how it reads in the room; simple shifts in rod placement and curtain length can alter perception dramatically. raising the rod toward the ceiling pulls the eye up and gives a room a taller, more elegant feel, while mounting the rod just above the window frame keeps proportions compact and grounded. Pay attention to fabric weight: light sheers create airiness,heavy velvets anchor the opening,and midweight linens strike a neutral balance. Subtle hardware and clean lines let the treatment steer focus rather than the frame itself.
- raise it high: mount 6-12″ above trim to create height.
- Extend it wide: extend rods 6-18″ beyond the jamb to visually widen.
- Crop to compact: hang curtains to the sill when you want a shorter look.
- Layer smart: a sheer on an inner rod + blackout panel outside gives depth without bulk.
- Tiebacks & puddles: use tiebacks to show glass; floor-puddling panels feel luxurious and elongating.
Try combinations that solve the room’s imbalance: high rod + long panels for scale, or flush rod + tailored hem for intimacy. The table below is a rapid cheat-sheet to match placement with the visual effect and fabric choice so you can test setups quickly without guessing.
| rod Height | Visual Effect | Best Fabric |
|---|---|---|
| 6-12″ above trim | Taller, airy | Sheer or linen |
| At top of frame | True-to-size | Light cotton |
| Flush with sill | Shorter, cozy | Medium-weight cotton |
| floor-puddling | Elongated, luxe | Velvet or silk blend |
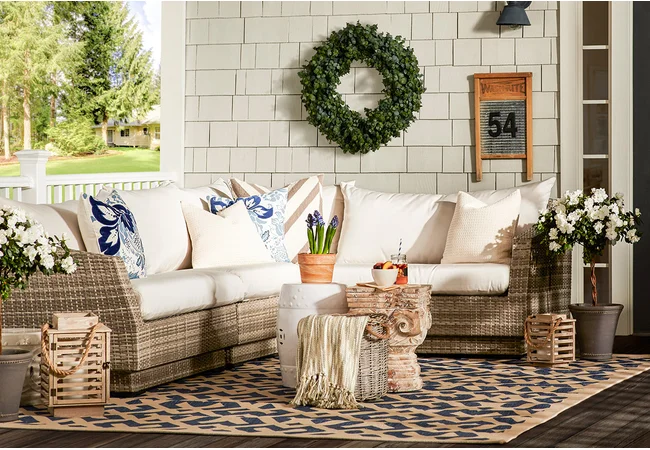
Layer shades blinds and drapery to control light and add depth without blocking the view
soft, stackable window treatments let you sculpt daylight and keep sightlines intact – think of them as wearable layers for your windows. Start with a translucent base such as a sheer shade or lightweight roller to filter glare while preserving the view, then add a secondary element for privacy and texture: a slim blind, a woven wood shade, or floor-length drapery that can be drawn only when needed.
- Sheer + top-down shade: daytime light control,evening privacy
- Woven blind + linen panel: natural texture without heavy blocking
- Roman + side drape: tailored look with soft depth
Treat hardware and placement like stagecraft: mount heavier panels high and wide to make the window feel larger,keep inner shades shallow so the exterior view remains uninterrupted,and choose cordless or slim-profile tracks for a clean sightline. Use a few simple rules to balance function and beauty – pick one fabric family for harmony, reserve bold pattern for the outermost layer, and use tiebacks or holdbacks to frame rather than cover the panorama.
- Height: hang rods 6-12 inches above the frame
- Width: extend 8-12 inches beyond the opening
- Function: prioritize ease-of-use for frequently adjusted layers
Anchor awkward windows with built in seating or shelving to create intentional function
Turn that awkward window into the room’s most purposeful pause by building in a seat or a stack of shelves that feels intentional rather than improvised. A custom bench with hidden drawers or a fitted shelving unit frames the opening and redefines the negative space as a usable feature – a morning coffee perch, a plant stage, or a homework station. Tailor the depth and height so sightlines remain pleasant and the window still breathes: a shallower shelf for displays, a deeper seat for lounging, and matching trim to make the addition read as original architecture rather of an afterthought.
Small details make built-ins sing: choose weatherproof finishes for sun‑bathed sills, add a soft cushion and bolsters for comfort, and layer adjustable lighting so the spot works day or night. Consider these quick ways to anchor the design:
- Reading nook: deep seat,plush cushion,pop-up book storage
- Display ledge: thin shelves,built-in picture rail,directional LED strips
- Hidden storage: pull-out drawers,hinged top,integrated outlets for chargers
| Intent | Built-in Solution |
|---|---|
| Cozy corner | Bench seat + cushions |
| Curated display | Stacked open shelving |
| Clutter control | Concealed drawers |

Change proportion with trim paint and mirrors to visually resize and harmonize the opening
shift how your eye reads the wall by treating the frame as either a stealthy continuation or a striking edge. Paint the trim the same hue as the surrounding wall to shrink the doorway visually, or choose a deeper, complementary shade to anchor and define it. Pair color with reflective surfaces: a strategically placed mirror can double perceived space, balance an off-center window, or echo the trim’s line to create symmetry.Try these quick tactics for immediate change:
- Blend: Trim in the wall color makes the opening recede.
- Frame: Darker trim emphasizes and straightens awkward proportions.
- Reflect: Mirrors opposite or adjacent to the opening extend light and sightlines.
Combine scale and finish for a harmonious result: slim, glossy trim paired with a narrow, vertical mirror will lengthen a squat opening, while wide matte molding and a larger horizontal mirror can lower a tall, awkward aperture to a friendlier visual height. Consider mirror shape as punctuation-round softens, rectangle reinforces-and position it so reflections capture more wall than clutter. Use a simple reference table to mix-and-match effects for common goals:
| Goal | trim approach | Mirror |
|---|---|---|
| Make opening disappear | Same color, minimal width | Small mirrored panel nearby |
| Visually widen | Contrasting horizontal trim | Wide horizontal mirror |
| Lengthen vertically | Tall, slim trim painted dark | Tall narrow mirror beside opening |
pro tip: test paint swatches and temporarily lean a mirror in place before committing-small experiments reveal the proportion that feels right for your room.
concluding Remarks
Awkward windows don’t have to be a design problem so much as a starting point. Whether you choose to celebrate their odd angles, soften them with textiles and plants, or make them disappear behind smart storage and layered finishes, the best solution will balance light, function and the room’s rhythm.
Start small: test treatments and furniture placement, use scaled mockups, and let natural light guide your choices. Think in terms of purpose-privacy,display,seating,or simply a conduit for daylight-and pick strategies that serve that purpose without fighting the architecture.
Over time, those once-unwieldy openings can read as intentional details-quirky, integrated, or elegantly concealed-depending on what your space needs. With a bit of planning and a willingness to experiment, an awkward window can move from nuisance to nuance, quietly improving the room’s character and comfort.