Having dull mower blades can make or break the look of your lawn. Dull blades rip and tear your grass instead of cleanly slicing it, leading to jagged cuts and brown grass that is more susceptible to disease. Luckily, changing your lawn tractor’s blades is not hard to do. Follow these steps to find out how you can easily replace the blades on your lawn tractor. Please note that instructions may differ slightly depending on the model, so make sure to refer to your operator’s manual before conducting any replacements or repairs.
You will need:
- Working gloves
- Eye protection glasses
- Wrench or socket tool
- New blades. Check which blades are best suited for your machine. You may be able to purchase these directly from your manufacturer’s website. For example, Cub Cadet lawn tractors have a range of replacement mower blades available online.
Steps
1. Examine the blades
Begin by thoroughly examining your lawn tractor’s blades to ensure they need to be replaced. If your lawn tractor’s blades are slightly dull, there is a good chance they only need to be sharpened. If this is the case, you can sharpen them by using an angle grinder or taking them to your closest lawn tractor dealership or mechanic. On the other hand, if the blades on your lawn tractor seem damaged, bent, or extremely worn down, it’s most likely time for a replacement.
2. Turn off your lawn tractor
Place your lawn tractor on a hard and levelled surface and engage its parking brake. Turn your engine off, remove the key from the ignition and ensure that your machine’s engine cools down completely. Put on your working gloves and glasses for added protection and disconnect both spark plugs.
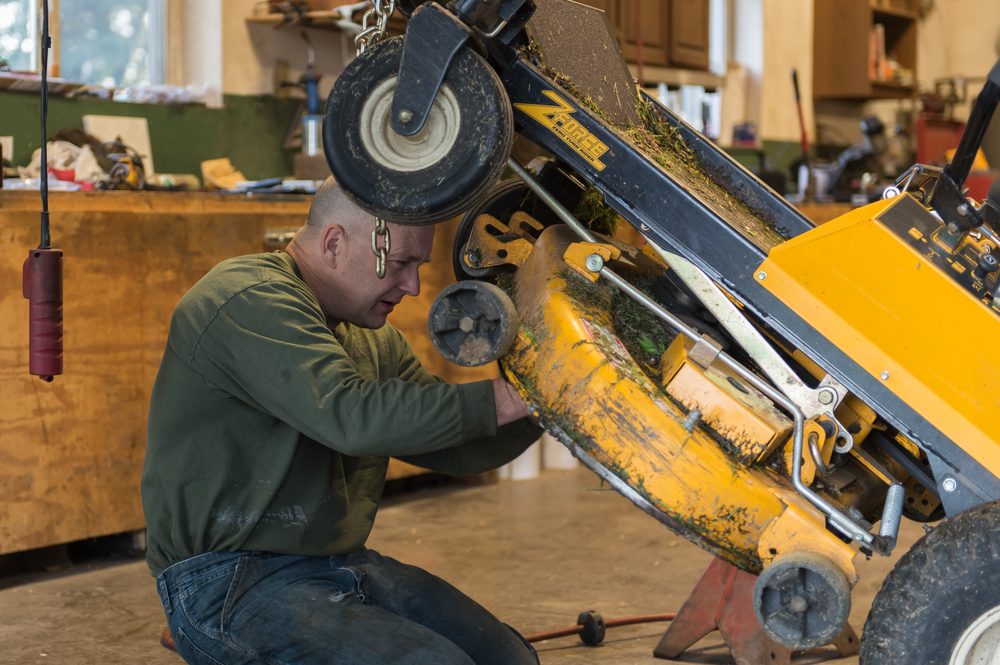
3. Raise your lawn tractor/remove the mowing deck
Raise your lawn tractor’s mower deck to the highest position. Continue by lifting one side of your riding mower using a jack, tractor lift, bricks, or cinder blocks. This will allow you to work underneath it without having to remove its deck. Check carefully to ensure that it is very stable before getting to work underneath it.
The last thing you want to deal with is being trapped under your mower! If your lifted lawn tractor seems unstable or you are unsure about working underneath it, you can remove its mowing deck. Do this by twisting and pulling the three pins that connect the mowing deck to the tractor, as well as the belt guard. Once the pins and belt guard are removed, slide the mowing deck from underneath your lawn tractor and turn it over to expose its blades. Refer to your manual for exact directions on how to do this for your particular brand and model of mower.
4. Remove the blades
Use a large wrench or socket tool to turn the nut in the centre of the blades counterclockwise. Continue to turn the nut until the blade has loosened completely and you can easily take it off. Repeat with the rest of the blades until all of them have been removed.
5. Replace the blades
Once the old blades have been removed, place the new blades right side up and tighten them into place using the nut and your wrench or socket tool. Double check that the blades are secure and oriented correctly.
6. Check the deck
With the blades replaced, thoroughly check your lawn tractor’s mowing deck to ensure all pieces are in the correct spot. If you removed the mowing deck, turn it over and slide it underneath your lawn tractor. Reconnect it to your machine by pushing the pins and belt guard back into place.
7. Lower your lawn tractor
Finish by carefully lowering your lawn tractor and reconnecting both spark plugs.
If you are still unsure about how to replace your lawn tractor’s blades after following these steps, take your lawn tractor to a certified dealer for repair. Conducting improper repairs on your lawn tractor could potentially damage your machine or lead to injuries.