The casing is nothing but the molding frames that you see in a window or door when you open them. Other than helping the doors and window to open efficiently, casings also fill in the gaps between the jambs and the walls. Housings also help in hiding the drywall’s raw edges. Casings are generally the same for all the rooms.
However, there is no thumb rule for the casings to be the same everywhere. In fact, if you pay a little extra attention to the casing details, then it can add additional value interest and make the room look richer as well. If you want to add casing to a window or door, it is always better to add insulation. You should consider making the casings of the exterior walls wider than the interior windows and doors. Also, pay attention to the size of the casing suit as well according to the size of the opening.
Materials needed
-
-
- Milter box, backsaw or a miter saw
- Tape to measure
- Hammer
- Nail set
- Driller or drivers
- Molding
- 2-inch trim head screws
- 2d, 6d, as well as, 8d finishing nails
-
Steps to be followed for door casing
Step 1: Draw the lines for the Jamb Edge

Housings are typically positioned to leave at 1/8 inch of the jamb’s edge and are made visible. This process is known as the reveal. In order to achieve the reveal, you must set a combination square which should be on 1/8 inch or else ¼ inch. Now, hold the pencil and start drawing a straight line along the head jamb. This should be done on both the jamb sides.
Step 2: Attaching the side casings

For the next step, start measuring the head casings from the floor on both the sides and now cut side casings to the measured length. Take five pairs of nails and start attaching the side casings from top to bottom. Let the nail distend though, just in case, if you need to pull them out or adjust the positioning of housing.
Step 3: Driving nails

Casings generally are back cut, which means they have a thin channel cut right in their backs. The purpose of these channels is pretty simple. They allow irregularities on the wall so that you can mold them tightly against the wall, as well as the jamb. Once you start installing the casings, begin by driving the nails right through those solid edges.
Step 4: Cutting the head casing
 The fourth step is to cut the head casings as per the length. Take a look at the picture to understand this step. It is better, to begin with, a slightly longer piece and if needed you can trim it later to fit it. Cut one end square for the butt-jointed head casings and hold it firmly. Start marking on the other side as well to achieve the exact cut.
Step 5: Time to set the head casing

Start nailing the head casing to the wall, as well as the head jamb. Use three pairs of nails to do that. It is better to drill holes in the casings first. This will ensure you against the milters opening. Drive 2-inch trim head screws. These screws will go through the head casings. Look at the picture to understand better. Now, set the nail heads once you are happy with how it looks.
Steps for casing a window
Step 1: Think about the casing type
Casing a window is almost similar to casing a door. The only difference is unlike the doors; you won’t use housing to the floor. You have two options to choose from. It can be either the traditional style, which includes a sill that bulges slightly at the bottom of the window. Ledge, which is known as stool technically, is the first thing that you will trim to install. The side casings are butt to the top of the windowsill. Apron, which is a piece of the housing is the applied right under the windowsill in the end.

In less conventional construction the ledge is dispensed with, and the packaging is folded over the window like an image outline. This system requests somewhat more joint-production expertise. No reasonable beginning stage exists; simply pick one of the sides and go from that point.
Conventional window trim starts with the stool. Utilize a jigsaw to cut the horns on either end, so they fit firmly against the drywall and the sides of the pillars.
Step 2: Installing the apron
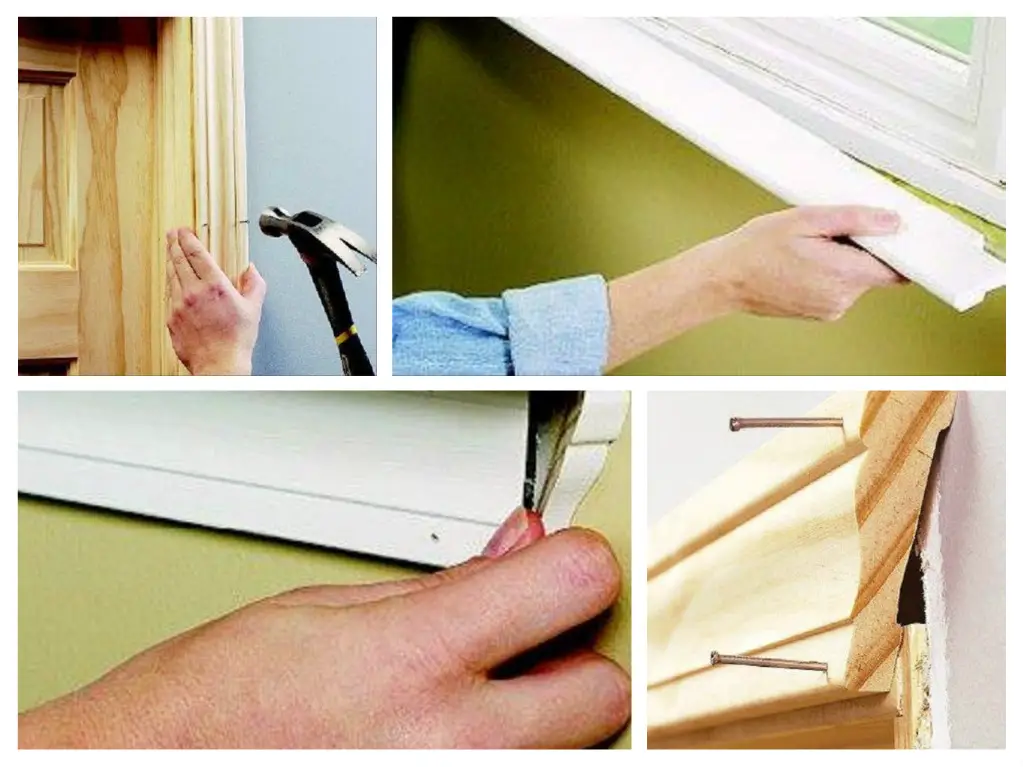
Take a look at the picture now. The apron here is getting attached right under the stool. This is the final piece of the window fitting. Now, measure the outsides of the side casings to ensure the length of the apron.
![A person is putting a piece of trim on a window. [No changes made]](https://livinator.com/wp-content/uploads/2019/08/image6-4-600x600.jpg "A person is putting a piece of trim on a window. [No changes made]")
On the off chance, the apron comes across as molded profile, miter the tops of the apron near the wall. Use some glue to attach the piece of molding to the wall and you are done.