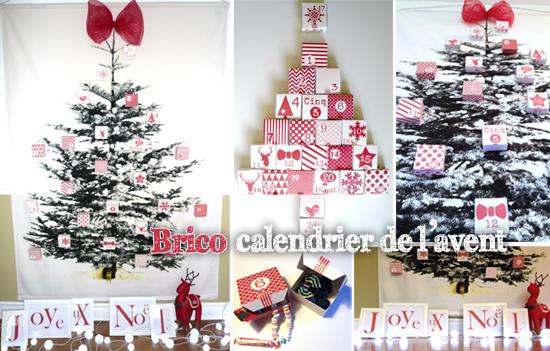
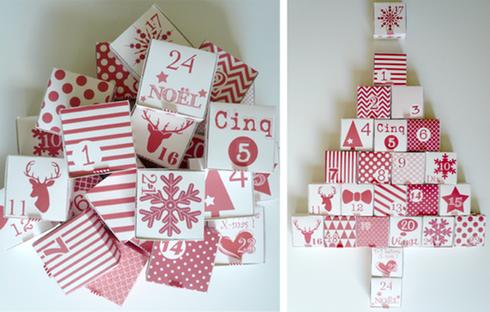
For the month of November I have concocted a DIY that will certainly please the whole family! This is a giant advent calendar. This Christmas do-it-yourself is easy to do, but can take a long time to complete if you want to do it all yourself. I suggest you start it in November so that it is ready to put in place from the beginning of December. You can also get help from a few little elves. To make an advent calendar filled with small gifts and fun deco level, follow the guide!
Pssttt! Since we are approaching Christmas, I have a little present for you! See you in Step 1 of this DIY Christmas!
For this DIY project , you need:
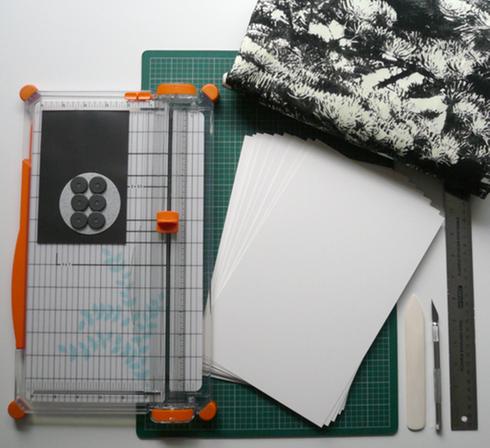
- Pair of scissors
- exacto
- Metal ruler
- Cutting and / or paper cutter for scrapbooking.
- 24 sheets of Bristol type white paper 270 g / m2 (Reserved for the courageous who will do this DIY in full).
- 24 Boxes of paper or cardboard (Reserved for clever people who prefer shortcuts).
- Bone pliers (optional)
- Double-sided adhesive tape or universal glue
- Washi Tape (optional)
- Decorative wall motif fir or other fabric (optional)
- 2 wooden dowels (optional, necessary to tension and suspend the fabric)
- Nails (optional, necessary to tension and hang the fabric)
- Hammer
- Rope or string (optional, necessary to tension and suspend the fabric)
- Magnets (self-adhesive foils) and 24 metal plates (metal magnets)
OR
- Velcro strips or velcro pads
- Hot glue gun and glue sticks (to glue velcro)
- To enjoy my gift: a computer and a printer
Step 1
Draw and design your boxes by hand or CAD (Computer Aided Drawing) software. For those who would like to have the same boxes like mine, here is my little Christmas present in advance: Click on this link to download the 24 templates I designed for this DIY. (Ho ho ho! Merry Christmas !!!)
Print your 24 templates on rather a thick Bristol type sheets (mine is 270g / m2).
2nd step
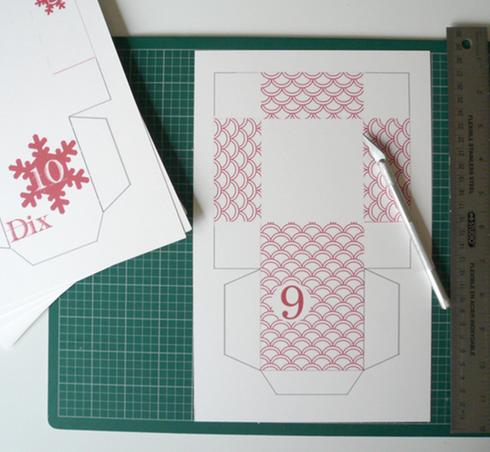
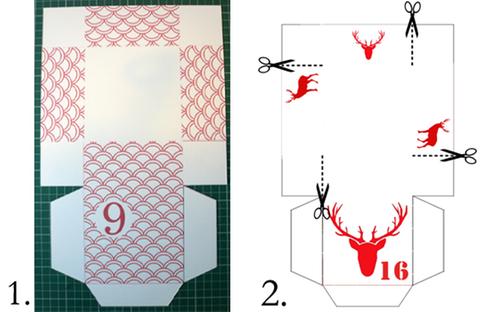
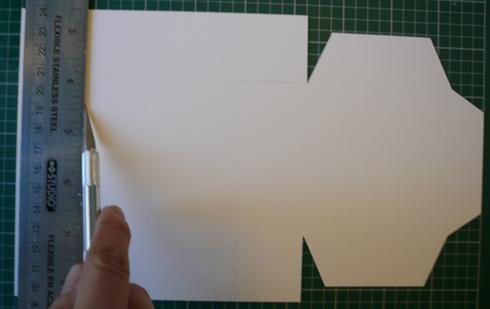
Cut out all your boxes with the cutter or the exact and your cutting mat as shown in the photos below.
Step 3
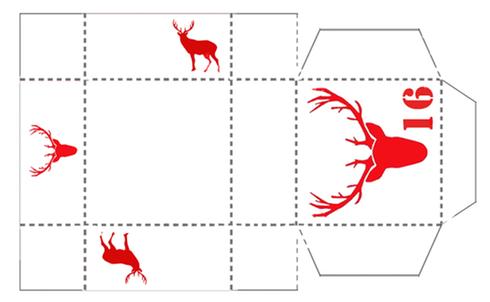
Fold your 24 boxes following the dotted lines shown in the diagram. In order to obtain beautiful folds without having to hurt your fingers, you can help yourself with a bone folding machine.
Step 4
Mount your boxes. Glue the flaps with double-sided tape or universal glue.
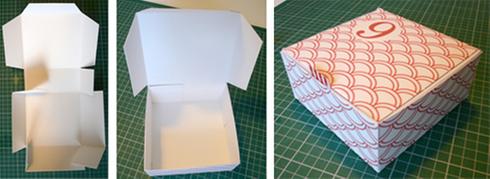
Step 5
Once your boxes are formed, stick on the bottom of each of them a magnet or velcro (male part: rough part).
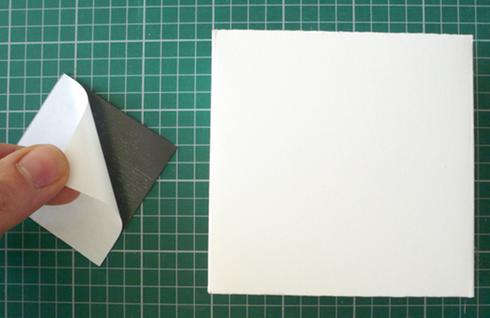
For those who wish to stop there, you can now place your boxes on a metal surface or on your fridge for those who are magnetic or on another surface for those with velcro (fabric, wood, bulletin board, etc.). For DIYers who wish, like me, to arrange them on fabric:
- Magnetic boxes: plan to place 24 metal plates behind your fabric to hold the boxes.
- Boxes with velcro: place the female part of the Velcro (soft part) on the fabric.
Step 6
Last year I missed, to my great regret, the purchase of a fabric having as a motif a huge tree! This year I did not get discouraged and I found this famous fabric. Thanks to the success, it has been improved for this year and transformed into a ready-to-use wall deco. For me who is completely nil in sewing, it’s perfect!
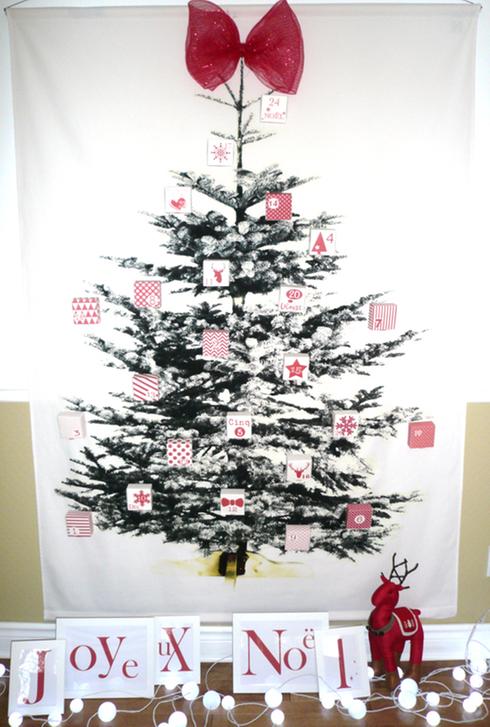
Place your round wooden studs in the 2 hems provided for this purpose. Place 2 small nails at each end of the wooden stud. Tie a string or string to the nails and hang your fabric.
Step 7
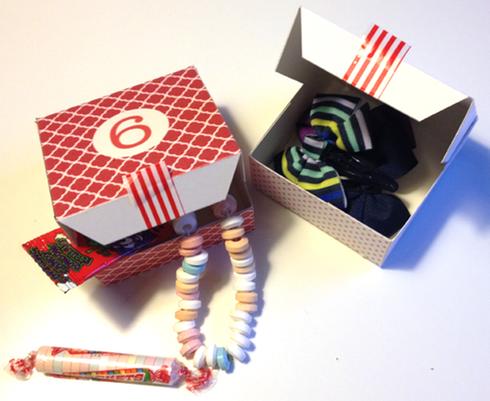
All you have to do is fill up your 24 boxes of candies, chocolates or other surprises. Let the magic work a little each day until Christmas. The countdown can begin with your advent calendar!
Good festive DIY!
Tips and tricks
- For those who do not want to make the boxes (I know, it’s long!), You can buy already pre-cut and pre-folded. To decorate them paint them, stick there drawings, gift paper and Gift Boxes, scrapbooking paper or Christmas decorations to personalize them! Do not forget to number them.
- For a perfect folding I marked all the folds of my boxes with the help of an exact (on the back of these). I then used my bone folder to fold all the flaps.
- In order to facilitate the opening of the boxes, I stuck a little improvised tongue using Washi Tape.
Self-adhesive Velcro strips or lozenges are not made to stick on the fabric. On the other hand, hot glue is effective. Place the velcro on the fabric where you want to place a box and stick them with hot glue.
