Electricity has become an integral part of our modern lives. From lighting up our homes to charging our devices, it’s hard to imagine a day without it. One such electrical concept that has gained popularity among homeowners is the switch loop, especially when setting it up for ceiling fans. If you’re someone who’s passionate about home, living, and garden, this guide is for you.
What is a Switch Loop?
A switch loop is essentially a connection between your light (or in this case, a ceiling fan) and a switch. This allows you to control the appliance without having to physically disconnect it. The switch loop can be used to create one or multiple switches, all operating the same light or fan. But why is this so important for homeowners?
- Safety: By understanding how a switch loop works, you can avoid potential electrical hazards. For instance, a common misconception is that only the brown wire is live. However, in a switch loop, a neutral wire can turn live, which is why it’s crucial to be aware of its workings.
- Flexibility: With a switch loop, you can control a light or fan from multiple switches, offering convenience, especially in larger rooms or multi-story homes.
- Efficiency: Properly set up switch loops can contribute to energy savings, as they ensure that appliances are only on when needed.
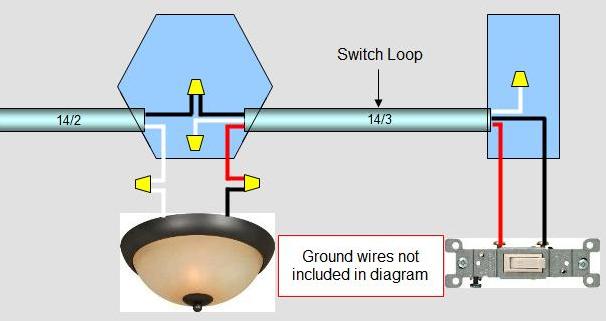
How Does It Work?
Are you wondering how this magic happens? Let’s dive deeper.
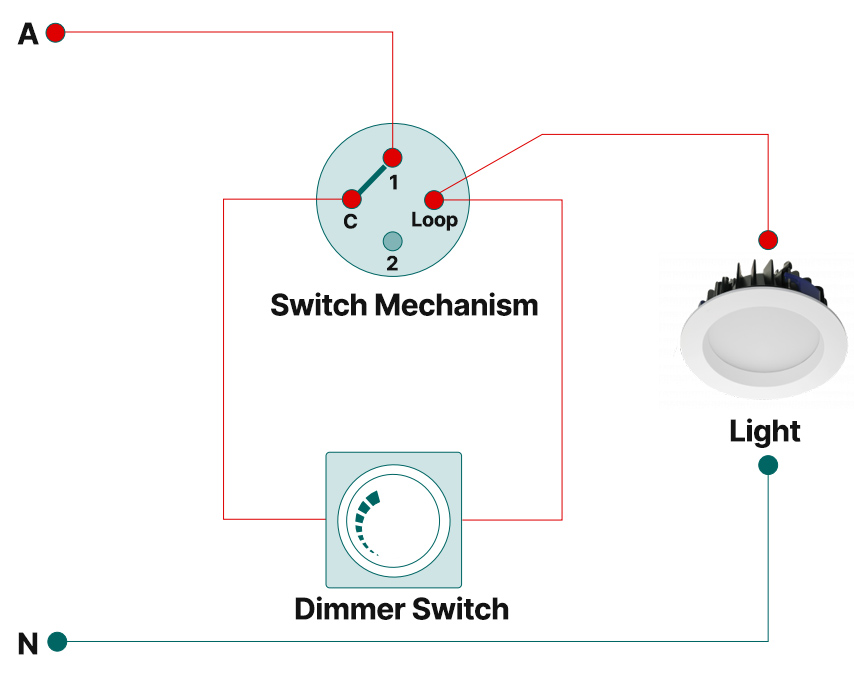
When Power Goes to the Light First:
- Identify the live wire from the light or fan.
- Connect this to a neutral wire running to the switch. Remember, the power doesn’t reach the bulb or fan at this point.
- Mark the neutral wire to indicate it’s acting as a live one.
- Connect the neutral supply to the light or fan as usual.
- At the switch, power comes in via the neutral wire. Connect this to the live terminal on your switch.
- Connect the live wire between the switch and the light or fan to the L1 connection on your switch.
- Continue the neutral feed by connecting the fourth wire in your switch feed to the neutral terminal on both the switch and the light or fan.
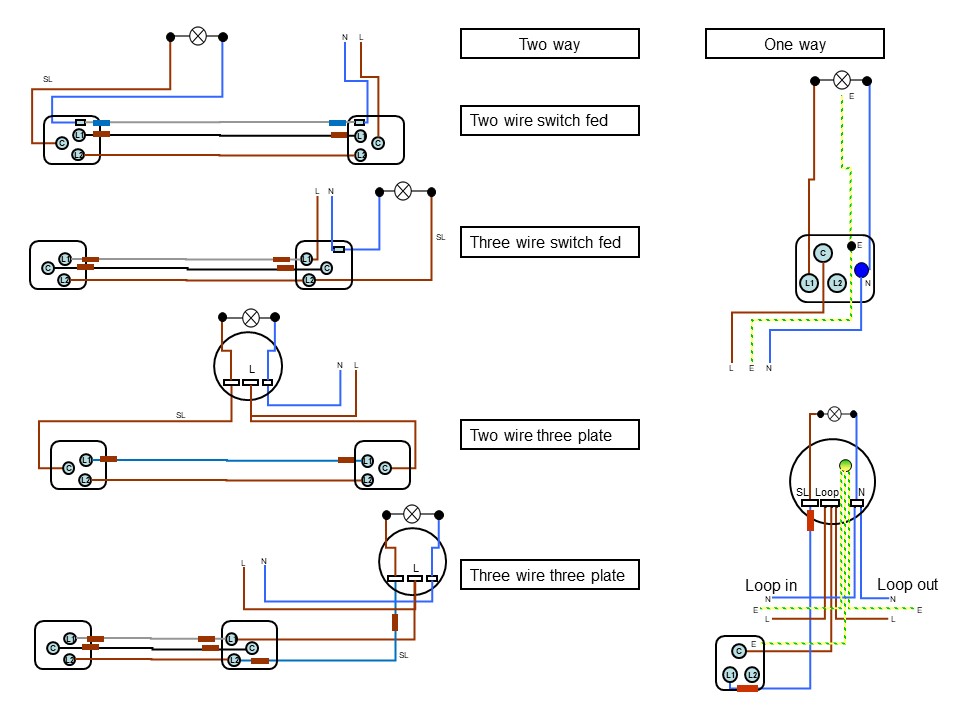
When Power Arrives at the Switch First:
This setup is quite similar to the first, with the primary difference being the source of the live power. It’s simpler and more straightforward, but less common.
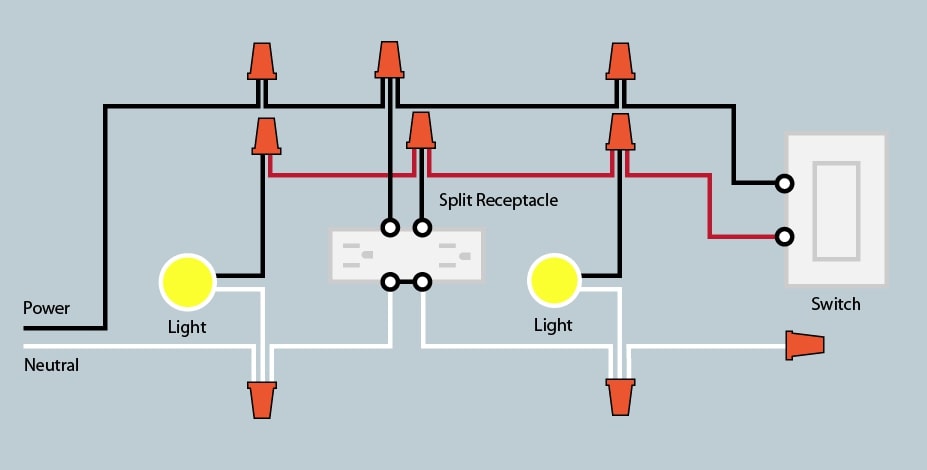
Adding Two Switches to a Loop:
For larger spaces or multi-story homes, you might want to control a light or fan from two different locations.
- Run the power to one of your switches via the neutral cable.
- Attach the neutral cables together for the power input, both switches, and the light or fan.
- Connect the L1 sockets on both switches.
- Run a cable from the power input on the second switch to the live connector on the light or fan.
Remember, safety first! If you’re unsure about any step, consult with a professional.
Why Should You Consider a Switch Loop for Your Ceiling Fan?
- Convenience: No more walking across the room or up the stairs to turn off a fan.
- Energy Savings: Ensure your fan is only on when needed, contributing to energy efficiency.
- Aesthetic Appeal: Reduce clutter with fewer visible wires and switches.
Lessons Learned
- Always prioritize safety. If unsure, consult with a professional.
- Proper labeling of wires is crucial to avoid confusion and potential hazards.
- A switch loop offers convenience, flexibility, and safety.
For a more detailed understanding of switch loops, you might want to check out this comprehensive guide on switch loops.
Lastly, according to Electrical Construction & Maintenance, understanding the basics of your home’s electrical system can not only enhance safety but also improve energy efficiency.