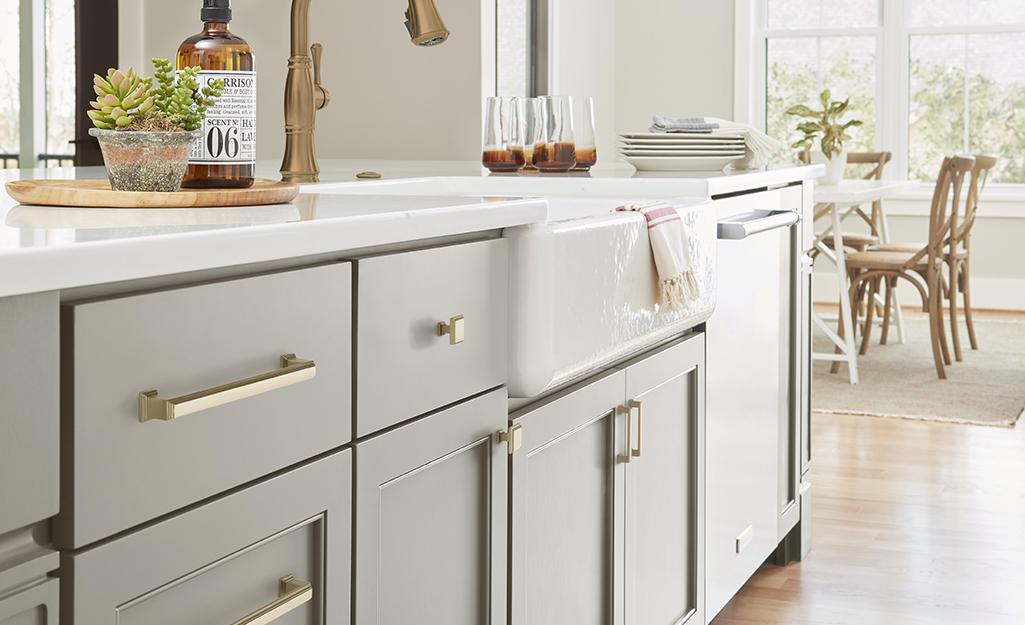
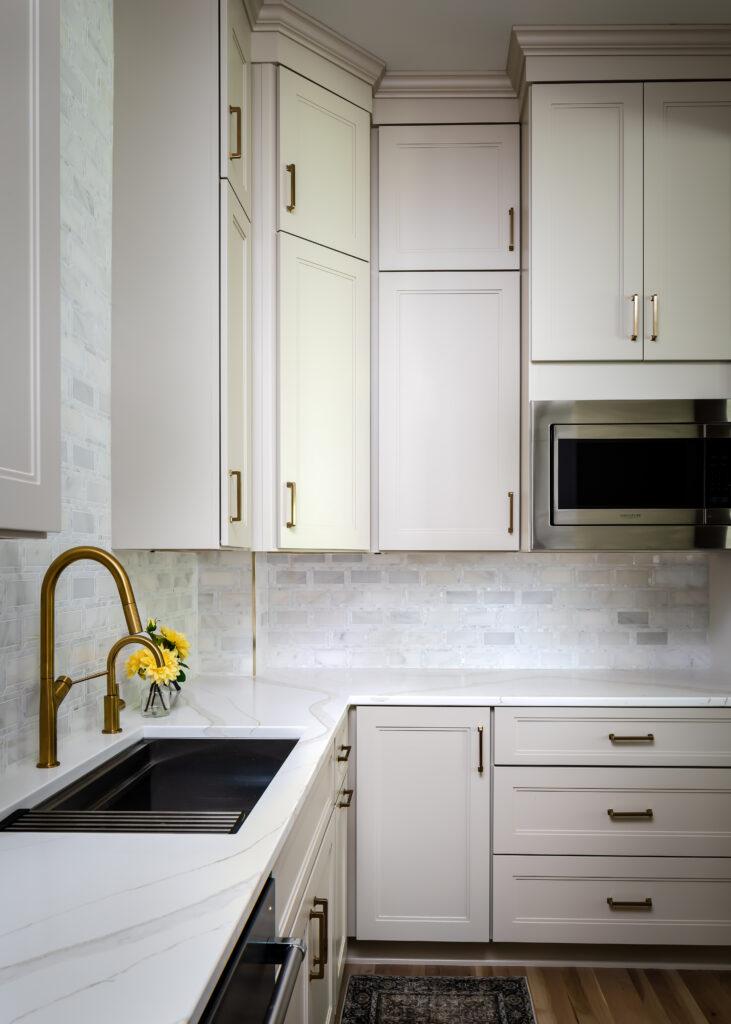
A cabinet knob or pull is a small detail that quietly defines a room. Swap out the hardware and suddenly your kitchen, bath or built-in looks refreshed, more intentional and put together-frequently enough for a fraction of the cost of repainting or replacing cabinetry. Hardware is one of those design moves that feels both practical and upscale: it’s functional, tactile and one of the most visible ways to express style.
This article walks through how to give your cabinets a designer upgrade using hardware alone. You’ll learn how to choose finishes and shapes that complement your existing palette, how scale and placement affect perception, and when to mix metals versus commit to a cohesive look. Expect practical tips for measuring, budgeting and installing, plus ideas for achieving specific styles from modern minimalism to vintage warmth.Whether you’re refreshing an apartment, staging a home for sale, or finishing a long-awaited remodel, thoughtful hardware can be the subtle design lift that ties everything together. Let’s start with how to read your current cabinets and identify the right hardware direction. satin nickel for versatility, and matte black for bold contrast”>
Select a metal and finish that complements your palette with practical picks like warm brass for traditional warmth, satin nickel for versatility, and matte black for bold contrast
Think of hardware like jewelry for your cabinets: it should echo the colors and temperature already living in the room. If your palette leans warm-honeyed woods, cream counters, terracotta accents-warm brass will amplify that cozy glow and feel intentionally classic. For kitchens and baths that sit between modern and traditional, satin nickel is the chameleon: it reads clean against white and softens cooler grays without stealing the show. When you want a crisp graphic statement, matte black cuts through light surfaces and grounds pale schemes with confident contrast. Quick pairing tips to try right away:
- warm brass: pair with warm woods, cream backsplashes, and warm-veined stone.
- Satin nickel: pairs with stainless appliances, gray tones, and subway tile.
- Matte black: pairs with white or pastel cabinets, bold tile, and industrial accents.
Practical picks make style easy: choose a finish that tolerates fingerprints where you need it and keeps harmony with fixtures like faucets and lighting. Below is a simple reference to help you decide at a glance:
| Finish | Best for | Effect |
|---|---|---|
| Warm Brass | Traditional, warm palettes | Inviting, luxe warmth |
| Satin Nickel | Transitional, neutral schemes | Understated, versatile |
| Matte Black | Modern, high-contrast rooms | Bold, graphic anchor |
- Tip: Match hardware finish to at least one other metal in the room for cohesion-think faucets, light fixtures, or stools.
- Practical pick: choose matte or brushed finishes in high-touch areas to hide smudges and wear.

Balance scale and placement for flawless function and proportion by matching pull length to door height,using center to center spacing for drawers,and testing ergonomic reach
Think of hardware as the punctuation of your cabinetry: the right size and placement turn a sentence into a statement. Start by matching pull length to door height so each handle reads in proportion-short,delicate pulls on shallow doors; long,bold bars on tall doors-and use center-to-center spacing on drawers to keep rhythm across runs.A few fast rules to sketch into your plan:
- Small doors: 3-3.5″ pulls keep things light.
- Standard cabinet doors: 4-6″ balances function and style.
- Tall doors or pantry faces: 8-12″ feels intentional and luxe.
These choices maintain visual balance from a distance and give you a coherent designer look up close.
Proportion only wins when it works for real life, so test reach and placement before committing: mount a sample pull on cardboard at various heights and open and close drawers and doors while standing where you usually work. Use this quick reference table to try combinations in your space (print and tape it up if you like), then refine by testing different grip positions and heights-children and accessibility needs may shift your sweet spot.
| Door Height | Recommended Pull |
|---|---|
| <18" | 3-3.5″ |
| 18-24″ | 3.5-4.5″ |
| 24-36″ | 6-8″ |
| 36-48″+ | 8-12″ |
A final tip: when everything looks good visually, do a few reps with your most-used drawers-ergonomic comfort is the last stamp of a true designer upgrade.
Combine shapes and hardware types to create designer layering: use knobs on doors with pulls on drawers, introduce a signature cup or recessed pull as an accent, and repeat a unifying metal
Think of hardware like jewelry for your cabinets: mixing shapes and finishes creates that layered, designer look without a full renovation. Pairing a classic knob on doors with a sleek pull on drawers gives each element its own voice while staying cohesive,and introducing a single signature piece-a recessed pull or a small cup-acts as the visual hook. Simple repeats matter: choose one unifying metal (for example, matte black, aged brass, or brushed nickel) and echo it in small doses on hinges, towel bars, or open shelving brackets to tie the whole composition together.Balance, contrast, and a single repeated finish will transform everyday storage into a curated feature.
Use scale and rhythm to keep the look intentional rather than busy-large pulls on deep drawers, petite knobs on shallow doors, and an occasional cup or recessed pull as an accent. Try these quick combos to start experimenting:
- Round knob + Slim bar pull – modern farmhouse warmth
- Square finger pull + Recessed cup – sleek,minimal luxe
- Classic cup + Tapered knob – vintage-inspired contrast
| Door | Drawer | Accent | Metal |
|---|---|---|---|
| Round knob | Bar pull | Cup | Aged brass |
| Square knob | Recessed pull | Finger pull | Matte black |
| Tapered knob | Arch pull | Small cup | Brushed nickel |
Experiment,photograph different pairings,and repeat your chosen metal in small accents until the room reads like a finished,intentional design.

Choose performance upgrades that feel premium every day such as soft close hinges, full extension drawer slides, and concealed mounting for clean lines
Small, well-chosen hardware changes transform how you interact with cabinets every day – the kind you notice without thinking.Replace basic fittings with soft-close mechanisms for a hush of luxury, choose full-extension runners so every corner becomes reachable, and opt for hidden mounting that keeps silhouettes clean and uninterrupted. These upgrades reward the senses: doors float closed, drawers glide like drawers should, and fronts read like custom millwork.
- Quiet: soft stops erase slams.
- Access: full travel reveals the whole drawer.
- Aesthetics: concealed fixings leave uninterrupted planes.
- Durability: better hardware reduces stress and wear.
Pair the right hardware with a short plan and the result feels bespoke rather than retrofitted - and installation is often straightforward. Use the simple chart below to match a desired daily sensation with the component that creates it, plus one smart tip to get it right.
| Component | Everyday Benefit | Quick Tip |
|---|---|---|
| Soft-close mechanism | Quiet, cushioned closing | Choose adjustable dampers for varied door weights |
| Full-extension runners | Complete access to contents | Measure cabinet depth before buying |
| Hidden mounting | Seamless, high-end appearance | Plan hardware location to avoid visible screws |
Install and care like a pro with pilot hole sizing, consistent measurement techniques, proper screw lengths, and gentle cleaning routines to preserve finish and prevent wear
Small, precise prep pays off – drill pilot holes that are just slightly smaller than the screw’s solid shank so the threads bite cleanly without splitting the wood. Adopt consistent measurement techniques: use the same reference edge, a reliable ruler or caliper, and a pencil mark for every pull or knob so spacing stays uniform across a run of cabinets. When choosing fasteners, favor the correct depth – the screw should enter the substrate far enough to hold firmly but never poke through the opposite side; in thin door fronts that often means stepping down to shorter screw lengths or using spacer bushings to protect the finish and the hinge alignment.
- Measure twice, drill once – mark with a template or jig for repeatability.
- Countersink or counterbore where needed so screw heads sit flush and don’t abrade finish.
- Hand-start screws then finish with a screwdriver to avoid over-torquing and stripping.
After installation, preserve that designer look with gentle care: wipe hardware with a soft microfiber dampened in mild soap and water, never abrasive pads or harsh solvents that strip coatings. Dry immediately and consider a light coat of wax or a specialty metal protector on high-touch pieces to reduce micro-abrasion. Periodically check fasteners – a quick finger-tighten prevents wobble and uneven wear, while felt pads on knobs and pulls guard finishes on painted and lacquered surfaces.
| Hardware | Pilot Hole | Typical Screw Length |
|---|---|---|
| Knob (thin door) | 7/64″ (≈2.8mm) | 1″ – 1¼” |
| Bar pull (solid drawer) | 1/8″ (≈3.2mm) | 1¼” - 1½” |
| Hinge mounting | 3/32″ (≈2.4mm) | ½” – ⅝” |
The Conclusion
Small changes can read like a signature: swapping out knobs and pulls turns ordinary cabinetry into a carefully considered design detail. With a few well-chosen pieces you can introduce contrast, refine lines, and lift the whole room without a full remodel.
Measure, mock up, and consider both form and function-scale, finish, and hardware placement matter as much as style. Mix metals thoughtfully,test a handful of options against your cabinet color and countertop,and invest in durable pieces for everyday use. Remember that hardware should serve the way you live as much as it serves the look you want.
Whether you lean toward sleek minimalism or a more ornate, vintage feel, the right hardware is an easy, reversible way to give your cabinets a designer upgrade. Take your time, trust your eye, and let these small details become the finishing touch that makes the space feel intentionally yours.