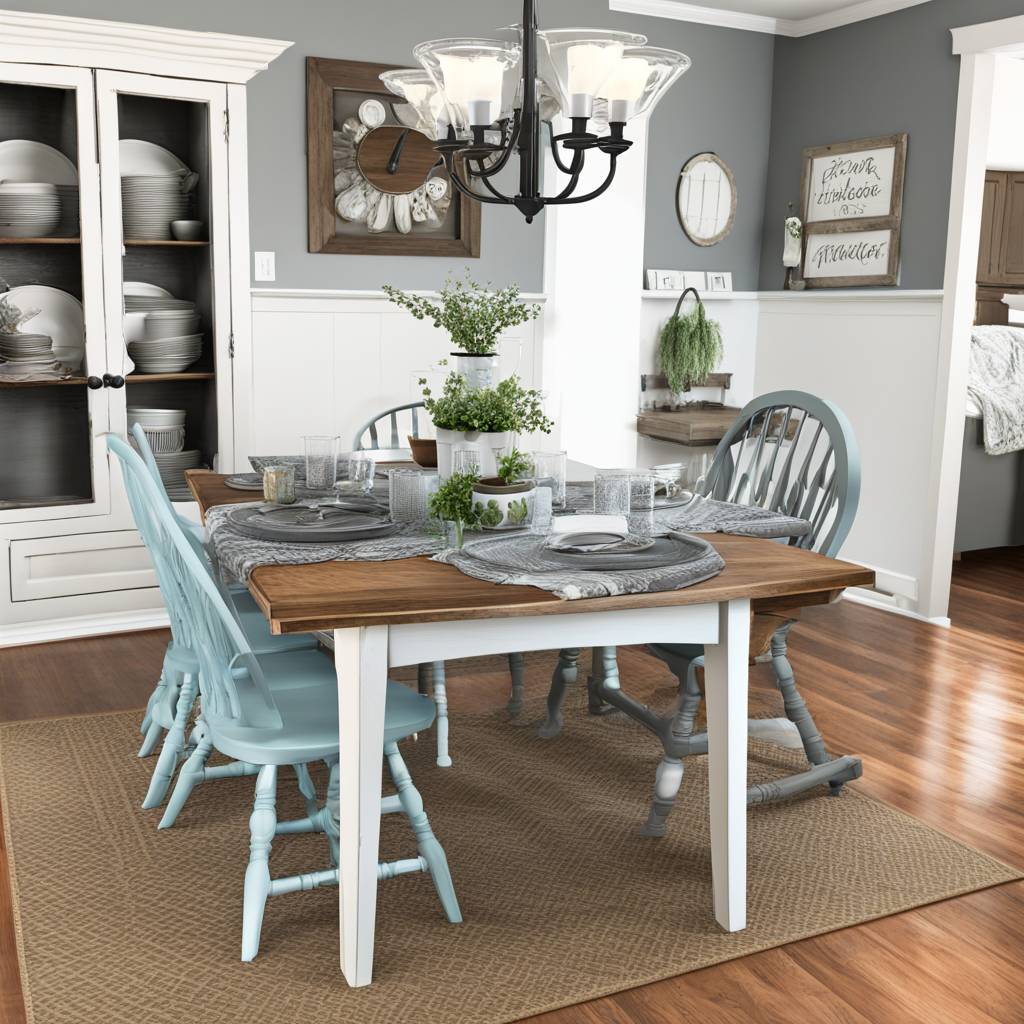
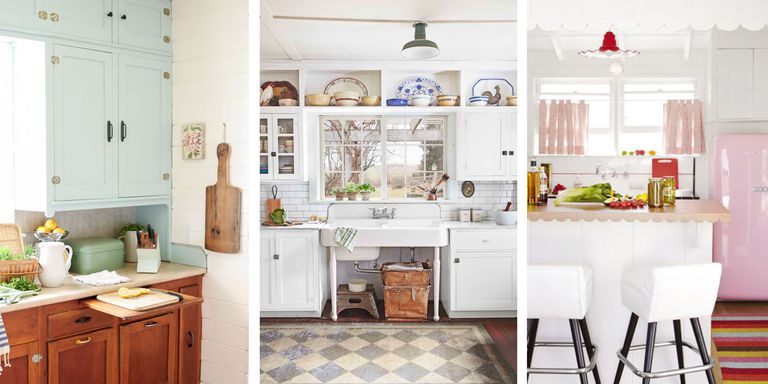
Dreaming of a charming farmhouse kitchen table and chairs without breaking the bank? We’ve got you covered with top-notch DIY tips to transform your tired table into a stunning centerpiece. Are you ready to roll up your sleeves and unleash your creativity?
You’ll discover easy-to-follow steps that will breathe new life into your space, creating a warm and inviting atmosphere for family gatherings and everyday meals. Get ready to elevate your dining area with simple yet impactful changes that reflect rustic charm and personal flair.
Key Takeaways
- Plan your makeover by considering the desired style, color scheme, and budget to ensure a cohesive and successful transformation.
- Prioritize thorough preparation of the table by cleaning, sanding, and repairing any damages to create a smooth and even surface for refinishing.
- When refinishing the table top, select a suitable stain or paint that complements the farmhouse aesthetic and apply it evenly for a professional finish.
- Achieve rustic charm by distressing the table top with sandpaper or using techniques like whitewashing or dry brushing to add character and texture.
- Revamp the base of the table by painting, distressing, or adding decorative elements to enhance the farmhouse style and create a cohesive look with the refinished top.
- Consider reclaiming old tables or using reclaimed materials to infuse authenticity and character into your farmhouse kitchen table makeover.
- Complete the transformation with finishing touches such as adding decorative hardware, distressing edges, or applying a protective sealant to prolong the table’s lifespan.
- Maintain the newly transformed farmhouse kitchen table by regularly cleaning it with gentle products, avoiding direct heat or moisture, and promptly addressing any damages to preserve its beauty and functionality.
Planning Your Makeover
Budget Considerations
When tackling a diy farmhouse kitchen table makeover, it’s crucial to consider your budget. Research cost-effective DIY materials such as reclaimed wood or salvaged hardware. Set a realistic budget that covers all aspects of the project, including materials, tools, and any professional assistance you might need. Consider repurposing existing materials from around your home to save money. For example, old wooden crates can be transformed into rustic shelves or used as decorative elements for the table.
Design Inspiration
Before diving into your makeover project, gather design inspiration to guide your vision. Explore various farmhouse-style design ideas that align with your preferences and the overall aesthetic of your home. You can find inspiration in home decor magazines featuring articles on farmhouse interior design and DIY projects. Moreover, scour online platforms for vintage farmhouse table designs; Pinterest is an excellent resource for discovering unique and charming styles that could inspire your own creation.
Material Selection
Choosing the right materials is pivotal when embarking on a farmhouse kitchen table makeover. Opt for durable and sustainable wood materials like oak or pine that will withstand daily use while exuding rustic charm.Prioritize environmentally friendly products to minimize the impact on both indoor air quality and the environment at large. Select high-quality hardware such as sturdy drawer pulls or elegant hinges that complement the farmhouse style while ensuring longevity.
Preparing the Table
Cleaning Process
Before diving into your DIY farmhouse kitchen table makeover, it’s crucial to start with a clean slate. Begin by thoroughly cleaning the table surface to ensure that there is no dirt or grime left behind. This step is essential as any remaining debris can interfere with the subsequent steps of the makeover process. Use gentle cleaning solutions to avoid damaging the wood, and make sure that all dirt and grime are completely removed.
For instance, you can use a mixture of mild dish soap and warm water to gently scrub away any accumulated dirt. Once cleaned, allow the table to dry completely before proceeding with the next steps in your makeover journey.
Stripping Old Finish
After ensuring that your table is impeccably clean, it’s time to strip off its old finish. To efficiently remove the existing finish, consider using a chemical stripper specifically designed for this purpose. However, it’s important to follow safety precautions when working with stripping agents as they can be potent and emit strong fumes.
When removing the old finish from your kitchen table, always work in a well-ventilated area to minimize exposure to potentially harmful chemicals. Wear protective gear such as gloves and goggles for added safety during this process.
Sanding Techniques
Once you’ve successfully stripped off the old finish from your table, it’s time to focus on achieving a smooth surface through sanding techniques. Utilize varying grits of sandpaper starting from coarse grit for initial sanding down to finer grits for a polished finish.
Remember always sand in the direction of the wood grain rather than against it; this helps prevent any unwanted scratches or imperfections on your newly refinished farmhouse kitchen table. Take care when sanding around edges and corners so that these areas are equally smooth compared to flat surfaces.
Refinishing the Table Top
Opening Wood Pores
To start the diy farmhouse kitchen table makeover, it’s crucial to open up the wood pores for even staining. Applying a pre-stain wood conditioner helps in this process. This conditioner ensures that the stain is absorbed evenly, preventing splotchiness. After application, allow sufficient drying time before moving on to the next step.
Once dried, wipe off any excess conditioner using a clean cloth or rag. This step is essential as it prevents blotching and ensures that the subsequent staining process yields a smooth and uniform finish.
Staining Steps
Choosing an appropriate stain color is vital for achieving the desired farmhouse aesthetic. Whether it’s a warm oak tone or a rich walnut hue, selecting a color that complements your kitchen decor will enhance its visual appeal.
When applying the stain, ensure an even coat using either a brush or cloth. The type of applicator used depends on personal preference and experience level with different tools. After application, allow adequate time for the stain to penetrate into the wood based on how dark you want your tabletop to be.
Sealing the Wood
After completing these steps, sealing the refinished tabletop with polyurethane becomes imperative for protection against daily wear and tear in your kitchen space. Selecting a clear polyurethane sealant provides durability while showcasing the natural beauty of wood grain underneath.
Applying multiple thin coats of polyurethane creates an effective barrier against spills and scratches without compromising aesthetics. It’s important to ensure proper ventilation during this process as polyurethane sealants can emit strong fumes.
Achieving Rustic Charm
Distressing the Wood
When diy farmhouse kitchen table makeover, consider distressing the wood to achieve a rustic look. Use distressing tools like sandpaper or a wire brush to create an aged appearance. Focus on edges and corners, as these are areas that naturally wear over time. By doing so, you can give your table a weathered and vintage feel. Experiment with different distressing techniques such as pounding nails or using chains to create unique patterns.
For instance, if you want to achieve a heavily distressed look, focus on creating deeper grooves and scratches in the wood. This will give the table a more worn-out appearance compared to lightly distressed finishes.
Distressing the wood adds character and history to your farmhouse kitchen table while complementing its natural charm.
Danish Oil Application
When applying Danish oil during your diy farmhouse kitchen table makeover, ensure that you work in a well-ventilated area for safety reasons. Using a lint-free cloth, evenly distribute the oil across the entire surface of the table top. This helps enhance the natural grain of the wood while providing protection against moisture and stains.
After applying each coat of Danish oil, allow sufficient drying time before adding another coat—this ensures that each layer properly adheres to the wood surface for long-lasting results.
For example, if you’re working with oak or pine tables, Danish oil brings out their beautiful grain patterns while adding depth and warmth to their color.
Revamping the Base
Painting Tips
When updating your farmhouse kitchen table, opt for warm, earthy tones like creamy whites, soft grays, or muted blues to achieve that sought-after rustic charm. High-quality brushes and rollers are essential for a smooth application. Applying multiple thin coats of paint ensures an even finish without unsightly drips or streaks.
For instance, instead of using bold and vibrant colors, consider a soft sage green or a weathered navy blue to complement the farmhouse aesthetic. These colors can evoke a cozy and inviting atmosphere in your kitchen space.Investing in good quality brushes and rollers will make the painting process much more manageable.
Farmhouse-inspired paint colors such as antique white or distressed gray can elevate the overall look of your kitchen table while maintaining its vintage appeal. By applying several thin coats of paint rather than one thick coat, you’ll achieve a more professional finish with no visible brush marks.
Protective Coating
After painting your farmhouse kitchen table, protect its newly refreshed surface with a wax finish. This not only adds an extra layer of defense but also imparts a subtle sheen that enhances the rustic allure. Buffing the wax after application creates an attractive luster on the tabletop’s surface.
Consider this: Once you’ve painted your table with those charming farmhouse hues, sealing it with protective wax will preserve its beauty for years to come. Reapplying wax as needed ensures ongoing protection against daily wear and tear while maintaining that desirable sheen.
- Pros:
- Farmhouse-inspired colors create a cozy ambiance.
- Multiple thin coats provide an even finish without brush marks.
- Wax coating offers added protection and enhances visual appeal.
- Cons:
- Choosing suitable color tones may require some experimentation.
- Applying multiple thin coats can be time-consuming.
- Regular reapplication of wax is necessary for long-term maintenance.
Reclaiming Old Tables
Vintage-style Knobs and Pulls
When giving your diy farmhouse kitchen table a makeover, consider updating the hardware. One way to do this is by replacing outdated hardware with vintage-style knobs and pulls. These small details can make a big difference in enhancing the overall farmhouse aesthetic of the table. By choosing rustic, antique-looking knobs and pulls, you can add charm and character to the piece.
Incorporating these vintage-style elements into your farmhouse table makeover creates an authentic and cohesive look that aligns with the farmhouse theme. For example, you might opt for wrought iron or brass hardware to achieve an antique feel. This simple change can instantly elevate the appearance of your table while staying true to its farmhouse roots.
Mixing Hardware Finishes
Another tip for updating the hardware during your diy farmhouse kitchen table makeover is considering mixing different hardware finishes for an eclectic look. Instead of sticking to one type of finish, such as all brass or all black, you can mix things up by incorporating various finishes like copper, bronze, or pewter.
This approach adds visual interest and dimension to your farmhouse table, creating a unique and personalized style statement. For instance, if you have multiple drawers on your table, each could feature a different hardware finish while still complementing each other cohesively.
Finishing Touches
Final Assembly
After completing the DIY farmhouse kitchen table makeover, it’s time to focus on the final assembly. Carefully reassemble all components, making sure everything fits snugly together. Start by placing the tabletop on a clean, flat surface and then attach the legs securely. Double-check alignment and stability before considering the project complete.
Once you’ve applied varnish or paint to your table, make sure that each part is dry before assembling them together. This ensures that there are no smudges or marks left behind from handling wet surfaces. Tighten all screws properly to avoid any wobbling or instability in the finished piece. If you encounter any scratches during assembly, touch them up with a small brush using leftover paint or varnish from your project.
Decor Styling
Now that your farmhouse kitchen table is fully assembled, it’s time to add those charming decor elements that will truly bring out its rustic appeal. Accessorize with farmhouse-themed decor items such as mason jar centerpieces, vintage metal signs, or distressed wooden trays for a cohesive look.
Incorporate natural elements like potted herbs or succulents placed in decorative pots on the tabletop for a fresh and inviting feel. Woven textiles such as burlap table runners or cotton placemats can add texture and warmth to the overall aesthetic of your farmhouse-style kitchen space.
To create a cozy ambiance around your newly made-over table, consider adding warm lighting through pendant lamps above it or installing sconces on nearby walls. Soft lighting can enhance the welcoming atmosphere of your dining area while showcasing the beauty of your DIY farmhouse kitchen table.
Maintenance Tips
Regular Care
To keep your DIY farmhouse kitchen table looking its best, establish a routine cleaning schedule. Wipe the table down after each use to prevent dirt and grime from building up. Use a mild soap and water solution for regular cleaning, and avoid harsh chemicals that can damage the finish.
Using coasters and placemats is essential to protect the surface of your table from scratches, water rings, and heat damage. Encourage family members or guests to use these items when setting drinks or hot dishes on the table.
Apply touch-up treatments as needed to maintain the appearance of your farmhouse kitchen table. Keep extra paint or wood stain on hand in case of minor scratches or scuffs. This will allow you to quickly address any imperfections before they become more noticeable.
Addressing Wear
Regularly monitor your DIY farmhouse kitchen table for signs of wear and tear, such as scratches, dents, or worn spots in the finish. Catching these issues early can prevent further damage and prolong the life of your table.
Repair minor damages promptly by sanding down rough areas or filling in small gouges with wood filler. Once repaired, apply a matching stain or sealant to blend it with the surrounding area.
Consider periodic refinishing as part of your maintenance routine to keep your farmhouse kitchen table looking fresh. Over time, daily use can take a toll on the appearance of the wood surface; refinishing allows you to restore its original beauty without having to invest in an entirely new piece of furniture.
Showcase and Summary
Before and After
The diy farmhouse kitchen table makeover resulted in a dramatic transformation. The before-and-after photos clearly exhibit the remarkable changes. The worn-out, dull appearance of the old table has been replaced with a fresh, stylish look. Specific details such as the color scheme, distressing techniques, and added features like decorative hardware can be highlighted to demonstrate the improvements.
The experience gained from this makeover project is invaluable. It provides insights into the process of reviving old furniture and turning it into something beautiful again. By sharing these insights, readers can gain inspiration for their own projects. For example, detailing how certain challenges were overcome or how creative solutions were implemented can offer practical guidance to those considering similar makeovers.
Project Recap
Summarizing the key steps taken during this DIY farmhouse kitchen table makeover allows readers to understand what it takes to undertake such a project successfully. Reflecting on challenges faced during the makeover offers an honest portrayal of the reality of DIY projects – they are not always smooth sailing but overcoming obstacles leads to personal growth and satisfaction upon completion.
Encouraging readers to embark on their own furniture makeover projects is essential as it instills confidence in them that they too can achieve satisfying results through their efforts. Sharing lessons learned from this project helps set realistic expectations for others who may be considering similar endeavors.
Closing Thoughts
Congratulations on making it through the DIY farmhouse kitchen table makeover journey! You’ve learned how to plan, prepare, refinish, and revamp your table to achieve that desired rustic charm. By reclaiming old tables and adding those finishing touches, you’ve truly transformed your space. Remember, maintenance is key to preserving your masterpiece for years to come.
Now it’s time to roll up your sleeves and bring those ideas to life. Don’t be afraid to get creative and put your personal touch on every step. Share your unique farmhouse table makeover with the world and inspire others to embark on their own DIY adventures. Your kitchen table is more than just a piece of furniture; it’s a reflection of your style and creativity. Get ready to enjoy countless meals and memories around your newly revamped farmhouse table!
Frequently Asked Questions
DIY Farmhouse Kitchen Table Makeover Tips FAQs
How do I plan the makeover for my farmhouse kitchen table?
To plan your makeover, consider the desired style, color scheme, and materials. Measure the table and assess any repairs needed. Create a mood board to visualize your ideas and ensure they align with your vision for the space.
What are some maintenance tips for keeping a farmhouse kitchen table looking its best?
Regularly clean the table with a gentle cleanser suitable for wood surfaces. Avoid placing hot items directly on the surface, use coasters under glasses, and promptly wipe up spills to prevent staining. Periodically apply a protective wax or sealant to maintain its luster.
Can I achieve rustic charm without completely refinishing the entire table?
Yes! You can distress specific areas of the table’s surface using sandpaper or other tools to create an aged appearance. Incorporating natural elements like woven placemats or floral centerpieces can enhance its rustic appeal without extensive refinishing.
Is it possible to revamp the base of my farmhouse kitchen table without professional assistance?
Absolutely! Consider painting or staining the base in a contrasting color to add visual interest. Swapping out traditional legs for chunkier ones or adding decorative accents like metal brackets can also breathe new life into your farmhouse table’s base.
How can I reclaim old tables to repurpose them as farmhouse-style pieces?
Look for secondhand tables at thrift stores, garage sales, or online marketplaces that have sturdy structures but worn finishes. With some sanding, painting, and creativity, you can transform these tables into charming farmhouse-style pieces that exude character and history.
